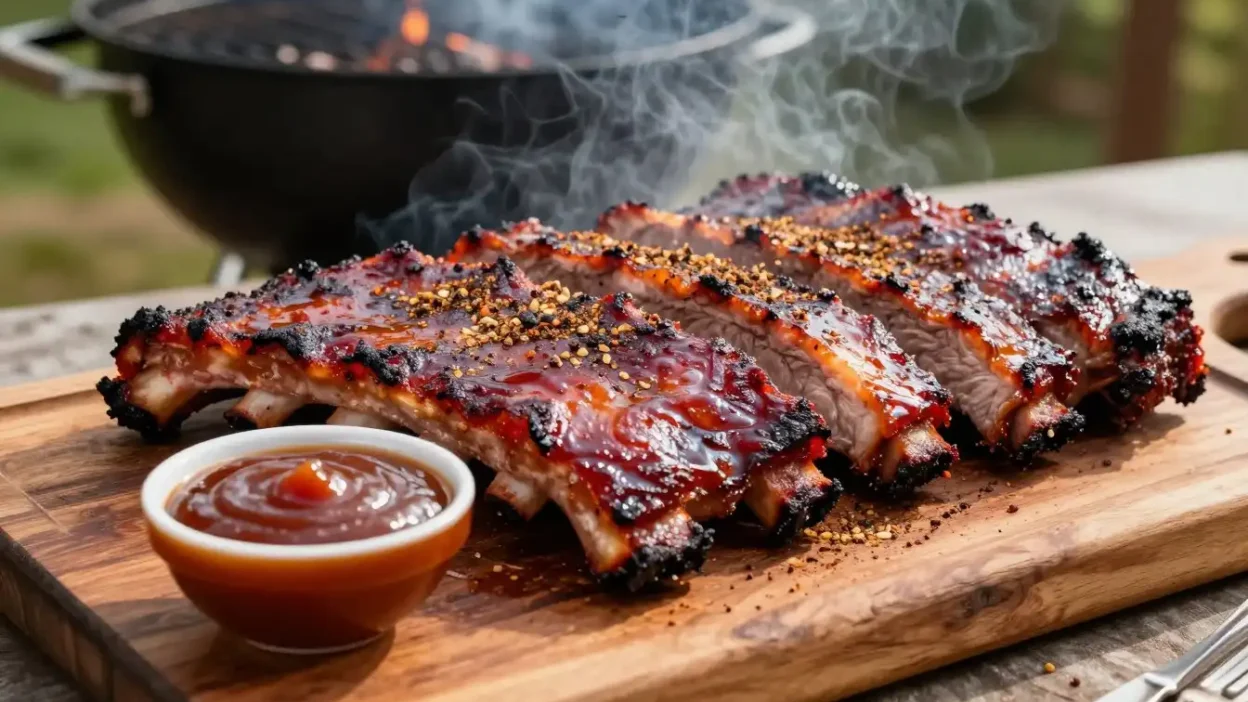
Brisket is legendary in Texas BBQ, but plate ribs—the true maverick bring richer marbling and a beefier flavor that’s hard to beat. The smell of smoked beef ribs is pure summer: smoke, spice, and that first bite that turns friends into believers. My own BBQ obsession started with a single perfect rib; that memory is why I wrote this recipe guide.
Direct answer: Smoked beef ribs are done when they hit an internal temperature of 203°F and a probe slides through the meat with zero resistance — typically taking 8–10 hours at 250°F. Keep that line handy; temperature + probe tenderness beats the clock every time.
This guide covers everything: how to choose the right beef ribs (so you don’t get a flimsy back rib by mistake), the authentic Texas SPG rub, smoker setup, wood choices, and step-by-step smoking technique to build a deep bark and incredible flavor. Scroll to the Selection section if you’re buying ribs today.
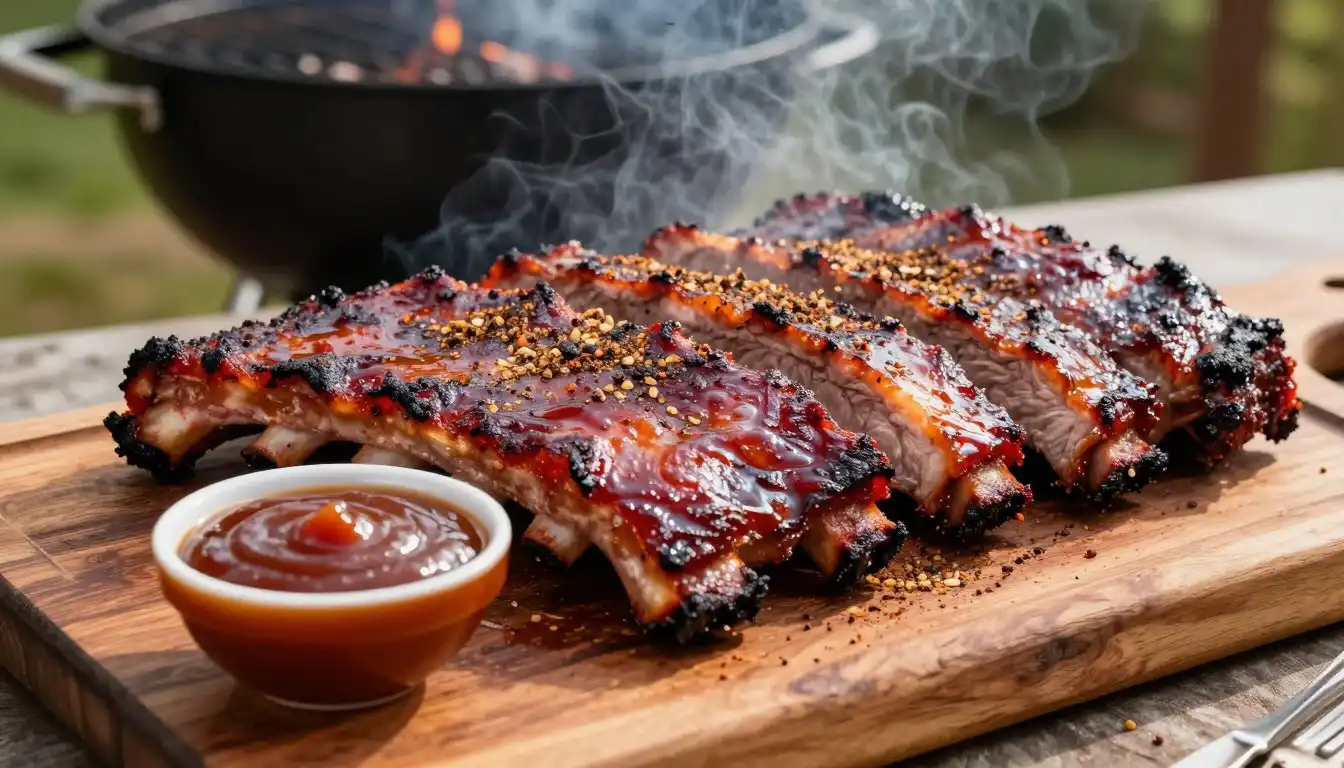
Easy Smoked Beef Ribs
Ingredients
Equipment
Method
- Trim excess hard fat and silver skin. Remove the membrane only if using back ribs.
- Pat ribs dry and coat lightly with mustard if desired.
- Mix salt, pepper, and garlic powder, then season all sides generously.
- Refrigerate for 30–60 minutes.
- Preheat smoker to 250°F (121°C).
- Add post oak, hickory, or pecan wood.
- Place ribs bone-side down.
- Smoke until internal temperature reaches 165–170°F, about 5–6 hours.
- Optional: wrap in pink butcher paper.
- Continue smoking until internal temperature reaches 203°F and the probe slides in easily.
- Rest for 30–45 minutes.
- Slice and serve.
Notes
- The ideal smoking temperature is 250°F for maximum tenderness.
- Cooking at 275°F reduces the cooking time slightly.
- Always cook by temperature and tenderness, not by time.
- Post oak provides the most authentic Texas BBQ flavor.
- Pink butcher paper preserves bark better than aluminum foil.
Nutrition (Approximate)
- Calories: 750 kcal
- Protein: 48 g
- Fat: 58 g
- Saturated Fat: 24 g
- Carbohydrates: 1 g
- Fiber: 0 g
- Sugar: 0 g
- Sodium: 980 mg
- Cholesterol: 180 mg
Understanding Different Types of Smoked Beef Ribs
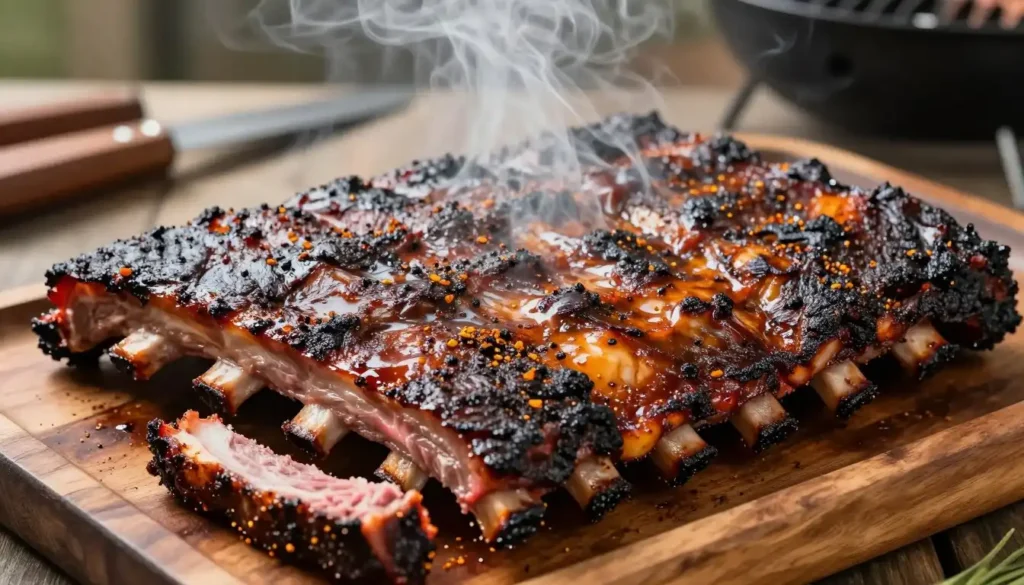
If you want show-stopping smoked beef ribs, start by choosing the right cut. “Beef ribs” is a broad term, the difference between a meaty plate rib and a thin back rib is the difference between a centerpiece and an appetizer. Below are the three ribs you’ll see at the butcher and how they behave on the smoker.
Beef Back Ribs vs. Short Ribs: What’s the Difference?
Beef back ribs come from the upper rib cage near the ribeye/prime rib. They have less meat on top of the bones and are leaner; they cook faster and are great when you want a lighter, quicker smoked rib.
Characteristics of beef back ribs and their fat content
Back ribs are typically leaner with modest marbling. They develop a nice bark but yield less meat per bone, so plan portions accordingly if you choose back ribs for your BBQ.
Understanding short rib varieties and bone structure
Short ribs (plate ribs) come from the lower chest and have a thicker meat cap, heavier intramuscular fat, and a denser bone structure. That extra marbling is what keeps large plate ribs juicy during a long smoke.
What Are Dino Ribs and Why Choose Them?
“Dino ribs” is the competition and party name for full plate short ribs — the dramatic, beefy slabs often weighing 1.5 lbs or more raw. A typical dino bone runs roughly 6–8 inches, and the meat over it can be as much as 1.5–2 inches thick on a full plate piece.
Explaining plate ribs and their exceptional meat coverage
Plate (dino) ribs are basically brisket on a bone: large, richly marbled slabs with meat covering the bones almost completely. If you see exposed bone along the top, you probably have back ribs; if the meat blankets the bones, it’s a plate/dino rib.
Why dino ribs deliver superior flavor and presentation
Because of the intense marbling, plate ribs deliver beefy, brisket-like flavor and an impressive final presentation — perfect for competitions or feeding a hungry crowd. Tip for the butcher counter: ask specifically for “Beef plate short ribs — NAMP 123A (untrimmed)” to avoid accidentally buying lean back ribs.
Essential Equipment and Setup for Smoking Beef Ribs
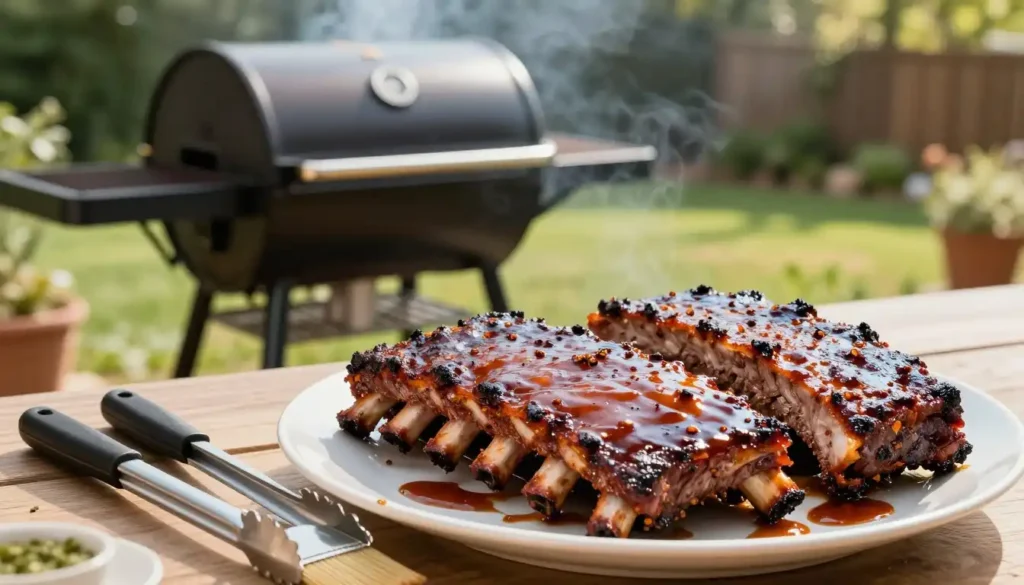
Great smoked beef ribs start with the right smoker and a simple, reliable setup. Whether you use a pellet grill, offset smoker, or a dedicated ribs smoker, the goal is steady heat and clean smoke. Below are the key selection points and a no-nonsense setup checklist.
Selecting the Right Pellet Grill for Ribs
Pick a smoker that holds temperature steady and produces a mild, controllable smoke. While many recipes list 275°F, the true “sweet spot” for plate/dino ribs is 250°F (better fat rendering and collagen breakdown). Use 275°F if you need a slightly faster cook — both work; know the tradeoffs.
- Temperature consistency: Look for a smoker or pellet grill with good insulation and a reliable controller (PID if available). Stable temperature equals even renders and predictable finish times.
- Smoke output and type: Choose a unit where you can dial smoke levels. For heavy beef cuts, prefer stronger woods — post oak, hickory, or pecan. Avoid mild fruit woods as the primary smoke for plate ribs; they’re too subtle for big beef flavors.
- Size and capacity: Make sure the grill fits full plate ribs (dino) standing or lying flat — rib racks help maximize space for multiple racks.
Quick setup checklist
- Fuel and pellets topped up (match wood to beef: post oak/hickory/pecan)
- Water pan or drip pan in place for humidity
- Leave-in temperature probe or dual probes installed
- Rib racks ready if you’re smoking multiple slabs
- Pink butcher paper on hand if you plan to wrap
Smoke Output and Flavor Considerations
Wood choice shapes the final flavor. For authentic Texas-style barbecue, post oak is the traditional favorite, while hickory and pecan provide a bolder smoke. Use mesquite sparingly, and blend fruit woods like apple or cherry with hardwoods for a more balanced flavor.
Before preparing your ribs, check out our Safe Meat Handling Tips to Prevent Foodborne Illness to help prevent cross-contamination and ensure safe cooking.
Must-Have Smoking Accessories
Tools that make the difference:
- Meat thermometer: An accurate instant-read thermometer is essential for spot checks — great for final pulls.
- Leave-in temperature probe: Use a reliable leave-in probe for continuous monitoring of the thickest part of the rib; it prevents frequent lid openings and heat loss.
- Rib racks and pans: Rib racks increase capacity and keep slabs organized; disposable foil pans make cleanup and spritzing easier.
- Pink butcher paper: If time-pressed, wrap in pink butcher paper at ~165–170°F to speed the cook while preserving bark better than foil.
With the right smoker, wood, and accessories, you’ll control heat and smoke — the two variables that determine whether your beef ribs finish with deep bark, rich flavor, and juicy texture.
Choosing and Buying Quality Smoked Beef Ribs
Choosing the right cut is the first step to excellent smoked beef ribs. Quality affects flavor, fat rendering, and final tenderness — so learn to read marbling, color, and the butcher’s label before you buy.
Identifying Prime vs. Choice Grade Beef Ribs
Prime grade ribs have noticeably more intramuscular fat (marbling) than Choice, which translates to richer beef flavor and greater juiciness after a long smoke. Choice is still perfectly suitable, especially if your budget or availability dictates it.
- Marbling indicators: Look for even white streaks of fat woven through the red muscle — more marbling = more flavor and moisture during the cook.
- Color and freshness: Choose slabs with a bright, cherry-red color and firm, creamy-white fat; avoid dull-brown spots or an off smell.
Marbling indicators to look for when purchasing
Good marbling should be visible across the meat cap on plate ribs (dino) and between muscle layers on short ribs. That fat is what keeps large beef ribs moist during an 8–10 hour smoke at lower temperatures.
Color and freshness signs of quality ribs
Fresh ribs won’t be dry at the edges; the muscle should look hydrated, and the fat should not be yellowed. If the butcher can show you the cutting date or the primal it came from, even better.
How Much Beef Ribs to Buy Per Person
Plan portions based on the cut and your crowd:
- Plate (dino) ribs: Rich and fatty — plan about 1 lb per person raw (these slabs shrink a lot as fat renders).
- Back ribs: Leaner with less meat — plan slightly more or combine with sides; allow 1–1.25 lb per person depending on appetite.
Standard serving recommendations and portions
A 3-bone plate rack commonly ranges 4–6 lbs raw and will serve about 4–5 people if you count 1 lb per person; adjust up if you’re serving heavy eaters or minimal sides.
Accounting for bone weight and yield
Expect significant shrinkage on plate ribs — roughly 40–50% of raw weight can be lost as fat renders and collagen melts. Back ribs yield less edible meat per bone, so factor that into portions.
Butcher tip: Ask explicitly for “Beef plate short ribs — NAMP 123A (untrimmed)” if you want full, meaty dino ribs. Saying only “beef ribs” can get you a rack of lean back ribs instead.
The Ultimate Dry Rub Recipe for Smoked Beef Ribs
A great rub defines the bark and frames the beefy flavor but for plate/dino ribs the classic Texas approach is simple: Salt, Pepper, Garlic (SPG). Below I give the SPG as the recommended primary seasoning and an optional sweeter rub for those who want more caramelized bark.
Ingredients and Measurements for the Perfect Rub
Primary (Authentic Texas SPG):
- 2 tablespoons coarse kosher salt
- 2 tablespoons coarse cracked black pepper
- 1 tablespoon garlic powder
Optional sweet rub (if you prefer a sweeter bark):
- 1/2 cup brown sugar (optional)
- 1/4 cup coarse kosher salt
- 1/4 cup coarse cracked black pepper (16-mesh descriptive: coarse/cracked)
- 2 tablespoons paprika
- 1 tablespoon crushed coriander seeds
- 1 tablespoon celery seed
When to use sugar (and when not to)
Many Texas pitmasters avoid sugar on heavy beef cuts because it can mask the beef flavor and risk over-darkening during a long smoke. Use the SPG for the truest beefy profile; add brown sugar only if you want extra sweetness and a darker mahogany bark.
Balanced spice proportions
For either rub, keep the salt and pepper prominent — kosher salt and coarse black pepper are the backbone of the seasoning, with the other spices used to taste. Coarse black pepper (cracked or 16-mesh) provides texture and that classic peppery bite on the bark.
Proper Application Techniques
How you apply the rub matters as much as the rub itself.
Creating a binding layer for better adherence
Use a thin binder so the rub sticks without changing flavor: yellow mustard, a light brush of hot sauce, or even plain water work. Mustard is effectively flavor-neutral after cooking and helps form an even crust.
Achieving even coating across all surfaces
Pat ribs dry, apply your binder sparingly, then generously season all exposed meat surfaces. Press the rub into the meat with your hands for even adhesion. Let coated ribs rest in the fridge for 30–60 minutes (or up to overnight) to hydrate and set the rub before smoking.
Preparing Your Beef Ribs Before Smoking
Good prep sets the stage for great smoked beef ribs. A few careful trimming steps — membrane, fat cap, and silver skin — will help the rub adhere, the bark form, and the meat render evenly. Below are clear, practical prep rules for both back ribs and plate (dino) ribs.
Removing the Membrane: Step-by-Step Guide
There’s nuance to the membrane question: for leaner back ribs removing the membrane allows smoke and seasoning to penetrate and usually improves tenderness; for large plate/dino ribs many Texas pitmasters intentionally leave the bone-side membrane intact to help the heavy meat stay attached during the long cook. Decide based on the cut and your end goal.
Techniques for Effective Membrane Removal
To remove the membrane (when you choose to): slip a spoon or a paring knife under the membrane at one end to loosen it, then grab it with a clean paper towel or gloved hand and pull steadily along the bone. Work slowly and keep the knife shallow to avoid cutting meat.
Why Membrane Removal (or Retention) Matters
If you remove the membrane, smoke and season more readily penetrate the meat, improving flavor and bark. If you leave it on a heavy plate rib, you reduce the chance of the meat pulling away from the bone during an extended smoke — both approaches are valid when used intentionally.
Trimming Excess Fat and Silver Skin
Trim judiciously: the goal is to remove thick, hard waxy fat and any silver skin that will prevent bark formation, while leaving enough intramuscular fat so the meat stays juicy.
Managing the Fat Cap for Best Results
On the meat side, trim off patches of hard, waxy fat but preserve a thin fat layer to baste the meat as it renders. Expose the meat where the bark should form, but don’t peel it down to muscle — you want fat to render slowly during the smoke.
Silver Skin Removal Tips and Importance
Silver skin can be tough and chewy; use a sharp knife to carefully slide it away. Pull it taut with a paper towel for grip and slice under it at a shallow angle, removing only the connective tissue and not valuable meat.
Quick do / don’t checklist
- Do remove membrane on lean back ribs for better seasoning and bark.
- Don’t reflexively remove the membrane on plate/dino ribs — leaving it can keep meat on the bone during very long cooks.
- Do trim hard waxy fat; leave rendering intramuscular fat.
- Do use a clean paper towel or glove when grabbing the membrane for safety and grip.
How Long to Smoke Ribs at 275 Degrees Fahrenheit
Time and temperature are the two levers that control tenderness and flavor. While many pitmasters use 275°F for a slightly faster cook, the true “sweet spot” for large plate/dino ribs is 250°F, which typically produces better fat rendering and collagen breakdown and results in a juicier final product. Expect roughly 8–10 hours at 250°F for full plate ribs; at 275°F plan closer to 7–9 hours.
Complete Smoking Time Breakdown
Use these guidelines to plan your cook and feeding schedule.
- General time frame: Plate (dino) ribs — ~8–10 hours at 250°F (7–9 hours at 275°F). Back ribs — thinner and leaner, often ready in 4–6 hours depending on size.
- Per-pound planning (rough): Rather than a strict per-pound rule, use the probe tenderness and target internal temperature as your guide; large bone-in pieces vary widely in thickness and fat content.
- Bone-in vs. boneless: Bone-in short ribs and plate ribs take longer because of thickness and connective tissue; boneless short ribs finish faster (6–7 hours is common at moderate temps).
The Famous 3-2-1 Method Explained (and its limits)
The 3-2-1 method (3 hours unwrapped, 2 hours wrapped, 1 hour unwrapped with sauce) is a simple framework that works well for many back ribs, but it’s not a one-size-fits-all for plate/dino ribs. Over-wrapping large, fatty plate ribs can push them past tender into mushy; many Texas purists prefer the no-wrap tradition to preserve a firm, well-developed bark.
When to wrap (Texas Crutch) vs. no-wrap
If time is tight or the ribs stall and you need to speed the cook, wrap in pink butcher paper (or foil) once the ribs hit about 165–170°F — paper breathes better and helps preserve the bark compared to foil. If you have the time and want maximum bark, leave them unwrapped and monitor probe tenderness.
Direct answer (featured snippet): Smoked beef ribs are done when they hit an internal temperature of 203°F and a probe slides through the meat with zero resistance — typically taking 8–10 hours at 250°F.
Step-by-Step Smoking Process for Perfect Beef Ribs
The path to restaurant-quality smoked beef ribs is a simple process done carefully: preheat the smoker, load the ribs, manage smoke and humidity, monitor temperature and tenderness, and finish with rest. Below is a concise, practical workflow for a successful cook—built around the 250°F “sweet spot” for plate/dino ribs, with notes for those who prefer 275°F.
Preheating Your Pellet Grill to 250°F (or 275°F)
For full plate/dino ribs, set your smoker to 250°F for the best balance of fat rendering and collagen breakdown—this usually means an 8–10 hour cook. If you need a faster window, 275°F will work (expect 7–9 hours) but can tighten the texture slightly. Preheat 15–20 minutes until the smoker reaches the target temperature and you see clean, thin (blue) smoke.
Proper Preheating Procedures and Timing
Power the smoker, top up pellets or fuel, and let it stabilize at the chosen temp for 15–20 minutes. Place a water pan if you plan to add humidity. Confirm with your leave-in probe that the smoker maintains steady heat before loading racks.
Configuring Smoke Settings Correctly
Set smoke output for a steady, moderate stream—big beef wants steady smoke over hours, not heavy, acrid plumes. Use post oak, hickory, or pecan for primary smoke; blend in milder woods sparingly if you like complexity.
Placing Ribs on the Grill
Arrange ribs bone-side down on the grates, leaving space for air circulation. Center rack placement generally gives the most even heat; if you have hot spots, rotate positions halfway through the cook.
Optimal Rack Positioning for Even Cooking
Use rib racks to stand slabs or lay them flat depending on capacity. Monitor for hot zones and move slabs as needed—good placement avoids uneven bark and overcooked edges.
Avoiding Temperature Hot Spots
Know your smoker’s hot and cool areas. If you don’t have a perfectly even chamber, rotate racks every few hours instead of constantly opening the lid. Fewer lid openings preserve both heat and smoke.
Monitoring Progress Throughout the Cook
Check visually every hour or two for bark development, but rely on probes for doneness. Use a leave-in probe for continuous internal readings and an instant-read for final checks.
Checking Ribs Every Hour for Signs
Look for a deep mahogany bark and steady smoke absorption. Instead of sugary spritzes, use a simple 50/50 mix of apple cider vinegar and water to spritz the surface intermittently (about every 45–60 minutes) if you need to maintain surface moisture—alternatively, use beef broth as a mop if you want more savory flavor.
Determining When to Wrap (Texas Crutch) vs. No-Wrap
Traditional Texas style is no-wrap to preserve a firm, robust bark. If you hit a stall or need to speed the cook, wrap in pink butcher paper once the ribs reach about 165–170°F. Butcher paper breathes and helps keep the bark intact better than foil; foil will speed cooking more aggressively but risks softening the bark.
Achieving the Ideal Smoked Beef Ribs Internal Temperature
Getting the internal temperature right is the single most reliable factor for perfect smoked beef ribs — but pair it with the probe-tenderness test and you’ll always hit the mark. Target an internal temperature of 203°F (acceptable range 200–205°F) for the best balance of collagen breakdown and juiciness.
Featured snippet / direct answer: Smoked beef ribs are done when they hit an internal temperature of 203°F and a probe slides through the meat with zero resistance, typically taking 8–10 hours at 250°F.
Target Temperature Guidelines for Doneness
Ideal pull temperature for tender results
Pull for tenderness around 203°F. That’s the sweet spot where connective tissue has generally converted to gelatin and the meat will be tender without turning mushy. Treat the 200–205°F window as acceptable, but use probe feel to confirm.
Understanding carryover cooking effects
Carryover cooking can raise the internal temperature a few degrees while the ribs rest; this means you can pull at or slightly below 203°F and let resting finish the job. Expect a modest rise — not a dramatic jump — so plan your pull accordingly.
Using a Meat Thermometer Correctly
Accurate temperature readings depend on correct probe use and good tools.
- Proper probe placement techniques: Insert the probe into the thickest part of the meat, avoiding contact with bone or large pockets of fat which can give false highs or lows.
- Leave-in vs. instant-read: Use a reliable leave-in digital thermometer for continuous monitoring; use an instant-read thermometer for final checks and spot readings.
- Safe leave-in placement: Route the probe so the tip sits in the center of the meat cap between bones, not touching bone. Secure wires to avoid shifting when you open the smoker.
Remember: temperature guides you, but probe-tenderness confirms it. When the probe glides through like warm butter, you’re ready to rest and serve.
Pro Tips for Juicy and Tender Smoked Beef Ribs Every Time
Turning out tender, juicy smoked beef ribs is about small, consistent choices during the smoking process: control moisture, build a stable bark, and rest properly. These pro tips will help you avoid common pitfalls and maximize flavor.
Maintaining Moisture Throughout the Smoking Process
Preventing dryness is mostly about humidity and avoiding over-opening the smoker.
- Use a water pan: Place a pan of water (or beef broth for extra flavor) in the smoker to create gentle steam—this helps keep the meat surface from drying during a long cook.
- Spritz recipe and timing: Use a 50/50 mix of apple cider vinegar and water as your spritz; lightly mist every 45–60 minutes if the surface looks dry. Beef broth is a savory alternative for mopping, but don’t overdo liquids or you’ll wash the rub off.
Creating a Perfect Bark on Your Ribs
Bark is flavor and texture—preserve it by balancing ingredients and heat.
- Balance sugar carefully: Sugar caramelizes to deepen color and flavor, but too much on a long smoke can burn. For true Texas-style beef, favor SPG (salt, pepper, garlic) and add modest sugar only if you want a sweeter glaze.
- Fixing hot spots or burnt areas: If an area over-charms, shield it with foil until the rest catches up; avoid persistent high heat on any single zone.
The Importance of Resting Your Ribs
Resting lets juices redistribute and finishes the texture change begun on the smoker.
- Minimum rest: Rest ribs for at least 30–45 minutes to let juices settle.
- Faux Cambro / extended rest: For service flexibility, wrap in pink butcher paper and place in a dry cooler (no ice) — this can keep ribs warm and juicy for 2–4 hours without overcooking.
No-wrap vs. Texas Crutch (quick summary): No-wrap preserves the firmest, most developed bark; wrapping in pink butcher paper at ~165–170°F (the Texas crutch) speeds the cook while preserving bark better than foil, and foil will speed the cook most but soften the bark.
Serving suggestion: cut the richness with classic Texas sides — pickled red onions, dill pickles, and plain white bread are simple, authentic pairings that balance the fat and flavor.
Conclusion
From picking the right cut at the butcher counter to the final probe check, every step matters when smoking beef ribs. Favor the 250°F “sweet spot” for plate/dino ribs (8–10 hours) for optimal fat rendering and collagen breakdown; use 275°F only if you need a slightly faster finish. Above all, trust the probe and tenderness over the clock — temperature plus probe feel is the reliable combo.
Direct answer reminder: Smoked beef ribs are done when they hit an internal temperature of 203°F and a probe slides through the meat with zero resistance — this usually takes 8–10 hours at 250°F for full plate ribs.
Patience and steady heat pay off: a well-rested rack with a deep, beefy bark and juicy interior is worth the time. Before serving, rest the ribs (see FAQ) so juices redistribute and the texture finishes properly.
FAQ
What are the best smoked beef ribs to choose for my BBQ?
It depends on the outcome you want: back ribs are leaner and quicker to cook, while plate (dino) ribs are large, heavily marbled, and deliver brisket-like flavor. For big, meaty presentation ask your butcher for NAMP 123A — beef plate short ribs (untrimmed).
How do I achieve tender smoked beef ribs?
Use steady low heat (250°F preferred for plate ribs), monitor internal temperature with a leave-in probe, and rely on probe-tenderness — the ribs are done when the probe slides in like warm butter at about 203°F. Wrap in pink butcher paper at ~165–170°F only if you need to speed the cook; otherwise the no-wrap tradition preserves firmer bark.
What is the internal temperature for smoked beef ribs?
Target 203°F for ideal tenderness. A practical range is 200–205°F, but always confirm with probe tenderness rather than temperature alone.
How long should I smoke ribs at 250–275°F?
Expect roughly 8–10 hours at 250°F for full plate/dino ribs; 7–9 hours at 275°F if you need a faster cook. Back ribs are thinner and often finish in 4–6 hours depending on size.
What is the peanut butter (probe) test for doneness?
The probe or “peanut butter” test assesses tenderness: insert an instant-read probe into the thickest part of the meat (avoiding bone). Done ribs feel like warm peanut butter or glide through with almost zero resistance.
Should I remove the membrane from beef ribs?
It depends: remove the membrane on lean back ribs to let smoke and seasoning penetrate, but many pitmasters leave the bone-side membrane on heavy plate/dino ribs to help keep the meat attached during a long cook.
What is the best dry rub for smoked beef ribs?
For authentic Texas beef, use SPG — coarse kosher salt, coarse cracked black pepper, and garlic (Salt, Pepper, Garlic). Sugar is optional; many pros avoid it on heavy beef cuts. If you prefer a sweeter bark, add a modest amount of brown sugar to a secondary rub.
How can I maintain moisture while smoking beef ribs?
Use a water pan to humidify the smoker, spritz with a 50/50 apple cider vinegar and water mix as needed, and avoid opening the smoker frequently. Mopping with beef broth is an option for extra savory flavor.
Why is resting my smoked beef ribs important?
Resting for at least 30–45 minutes lets juices redistribute and the collagen-settled texture finish. For flexible service, wrap in pink butcher paper and keep in a dry cooler for up to a few hours.